SSH and X-forwarding on Windows
Recommended:
Only if you want them:
Introduction
SSH is a prototcol for remotely connecting to Andrew Linux (or many other) machines, which you may find helpful for completing your assignments. In its simplest form, opening an SSH connection opens a terminal, as though you were sitting in front of a cluster computer with a terminal running. X-forwarding expands this by allowing you display applications with a GUI, such as a file browser, over the connection. Another option is to write your code locally and transfer it to AFS to compile and run using an sftp client. These features are built into Linux and Mac computers, but requires third party programs to run on Windows. While many options are available, below are instructions for setting up a few recommended options.
If you just want SSH access, follow the instructions for either PuTTY or SSH Tectia (ignoring the X-forwarding steps). If you want X-forwarding, follow the instructions for X-Win and, optionally, either PuTTY or SSH Tectia. If you use PuTTY or SSH Tectia for X-forwarding, X-Win still needs to be running in the background. If you want file transfer, follow the instructions for Filezilla, WinSCP, or SSH Tectia (edit the sftp configuration instead of ssh).
Although SSH Tectia is offered by CMU, that doesn't mean it's a very good program. It typically causes a few problems and is not recommended.
PuTTY
A download for PuTTY can be found here . PuTTY is available as a stand-alone executable or as an installation. Afterwards, open PuTTY.
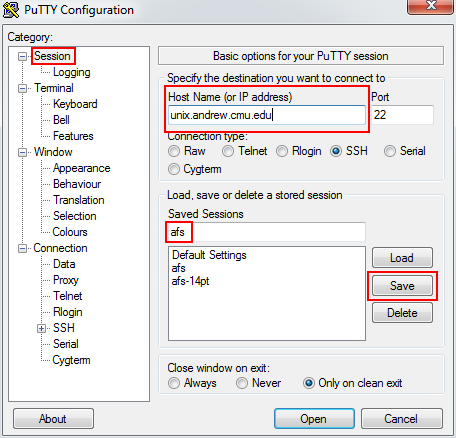
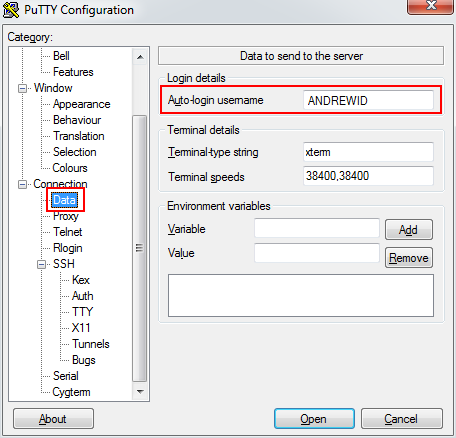
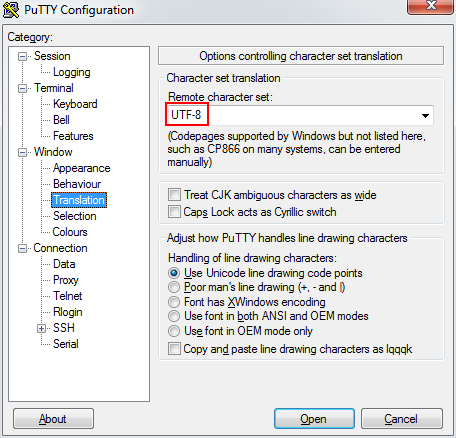
Enter the "Host Name" on the Session tab (image 1) and "Auto-login username" on the Connection->Data tab (image 2). Many other options are also available. You will want to save the configuration at the end (image 1). Next, go to Window->Translation and change the character set to "UTF-8" (image 3).
Only if also installing x-win:
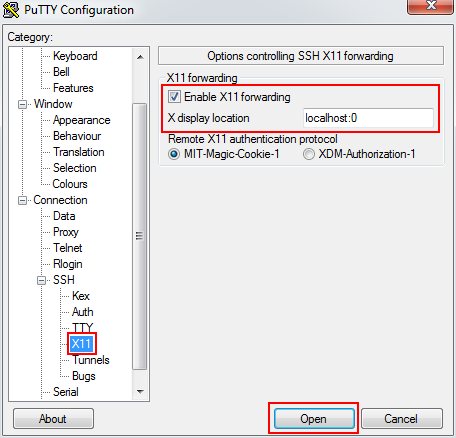
To enable X-forwarding, go to the Connection->SSH->X11 tab. You need to check the "Enable X11 forwarding" box and enter localhost:0 as the "X display location". Afterwards, go back to the Session tab and save the connection for easy access in the future. Consider saving separate configurations for with/without x-forwarding enabled.
Finally:
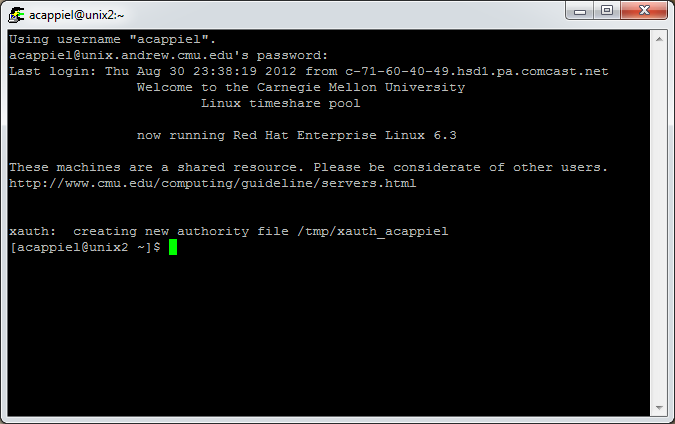
Click "Open" to connect.
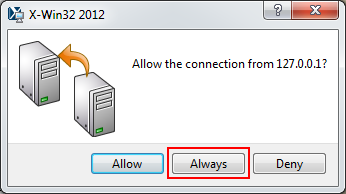
After opening a X-window for the first time, you may see a dialog box from X-Win like in image 5. Select "Always".
X-Win
X-Win is available from the CMU Computing Services website. Follow the provided instructions. The licence key is in a text file from the download. If you plan on only using X-Win for an X-server, you can stop here and continue setting up the connection in PuTTY or SSH Tectia.
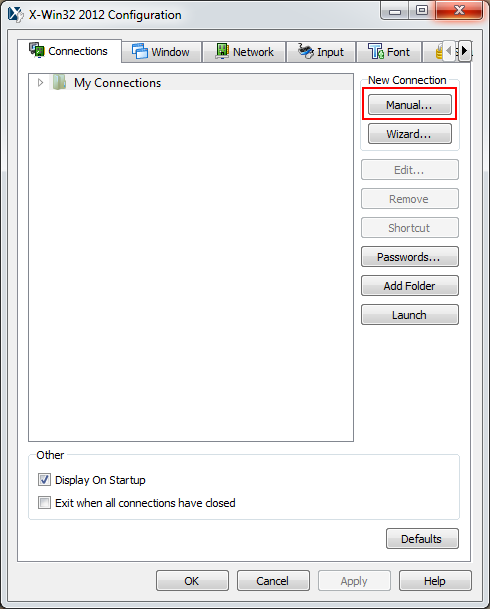
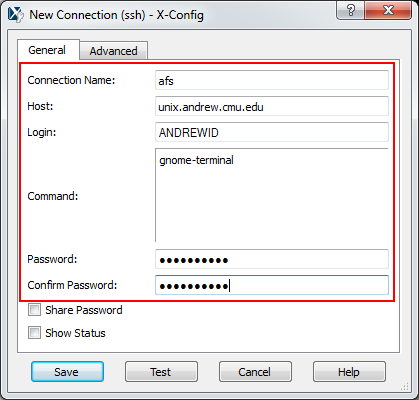
Open X-config (image 1) and nagivate to New Connection -> Manual...
A dialog (shown in image 2) will appear. Enter the shown connection information, substituting your login details. If you leave "Command" empty, it will default to launching xterm. Changing to "gnome-terminal" will give you a nicer terminal. You can now select the connection and click "Launch."
SSH Tectia
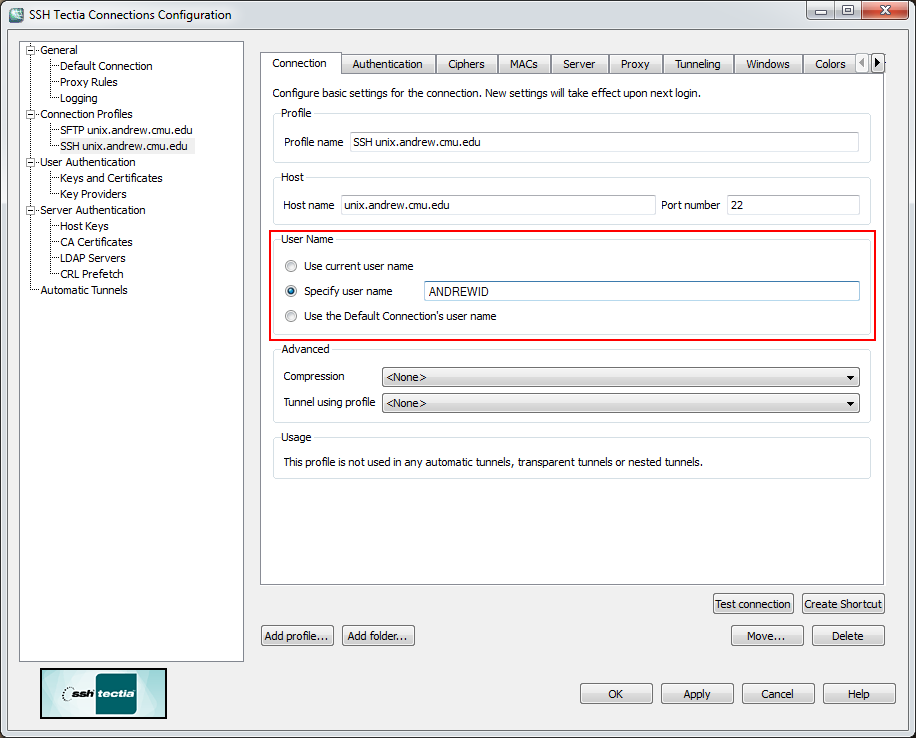
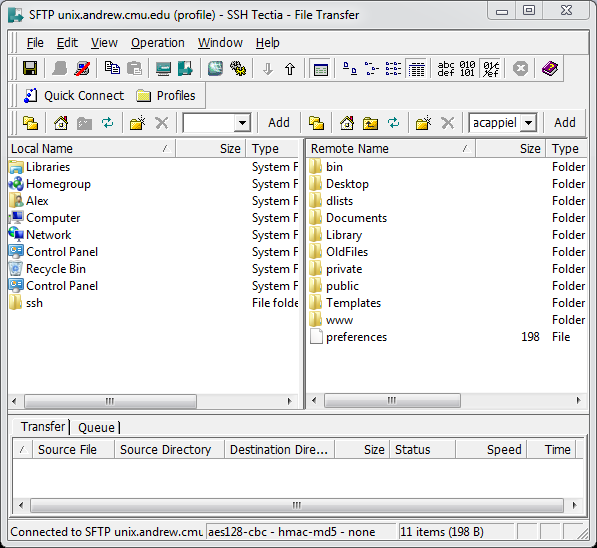
SSH Tectia is available from the CMU Computing Services website. Follow the installation instructions provided. After opening the program, navigate to Profiles->Edit Profiles (image 3). Edit the "SSH unix.andrew.cmu.edu" connection for SSH access and the "SFTP unix.andrew.cmu.edu" connection for sftp access. First, find the "User Name" box. Select "Specify user name" and enter your login information (image 1).
Only if also installing x-win:
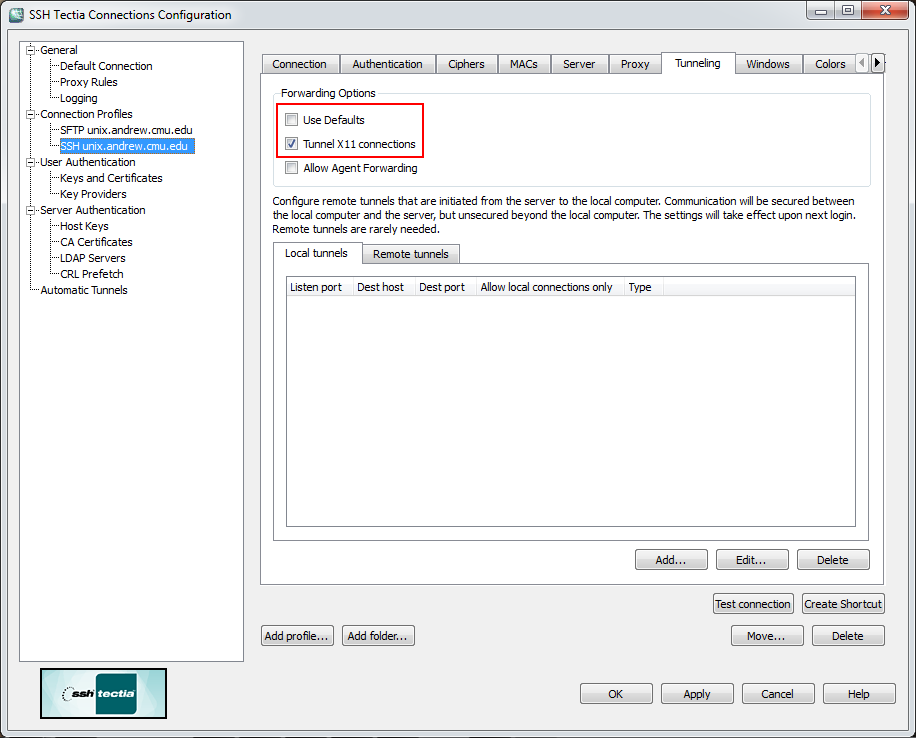
To enable X-forwarding, go to the Tunneling tab (image 2). Uncheck "Use Defaults" and check "Tunnel X11 Connections". You can now select this connection from the Profiles list.
Finally:
You can now select this connection from the Profiles list.

After opening a X-window for the first time, you may see a dialog box from X-Win like in image 4. Select "Always".
FileZilla
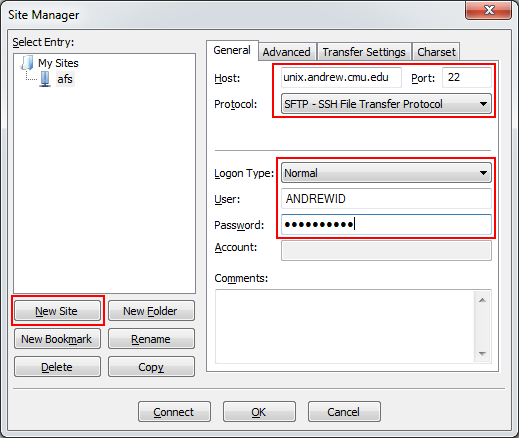
Filezilla is available here. Download and install. After opening, click on the Site Manager button (image 2) on the toolbar to bring up the configuration. Click on "New Site" and name the connection. Then, enter the proper information into "Host." Change "Protocol" to "SFTP..." and "Logon Type" to "Normal." Finally, provide your login information (image 1).
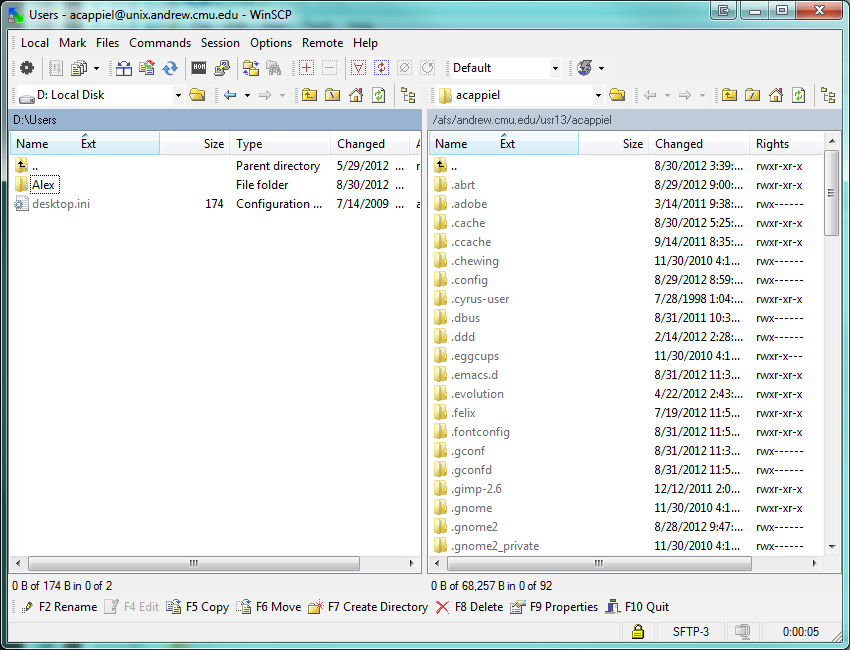
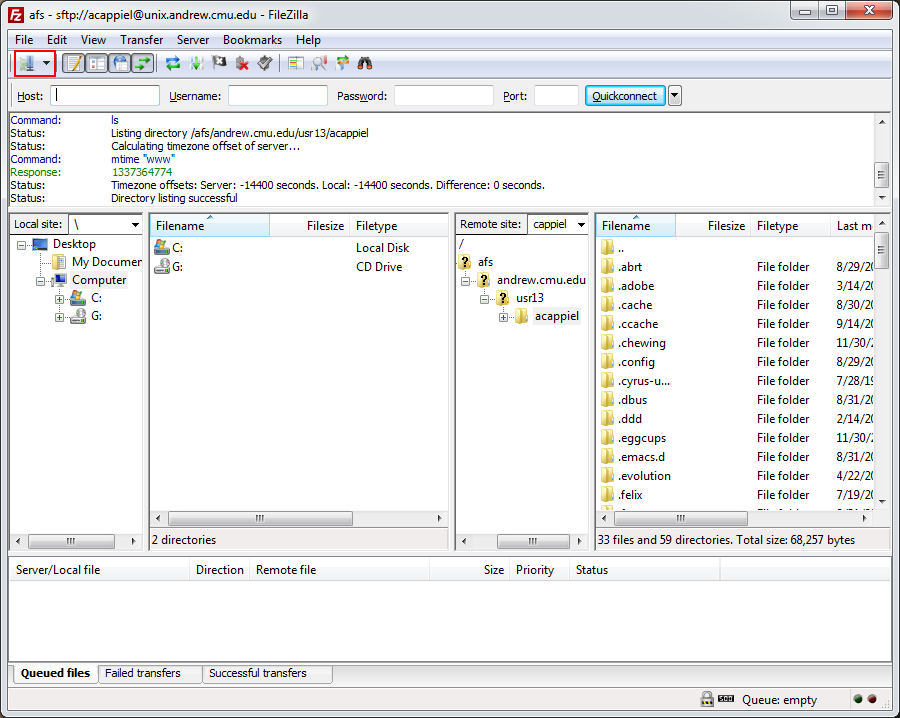
You can now connect using the drop down menu next to the Site Manager. On the left, you will see the files on your computer and on the right will be files on afs. You can double click on files or click and drag to copy items back and forth.
WinSCP
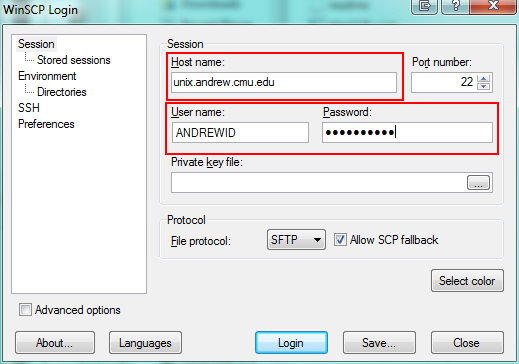
The WinSCP download is available here . After opening, you will be prompted to enter the connection information. Provide the host name and your login information and click "Login" (image 1).
Like with Filezilla, your local files appear on the left and the files on afs are on the right.